Getting started

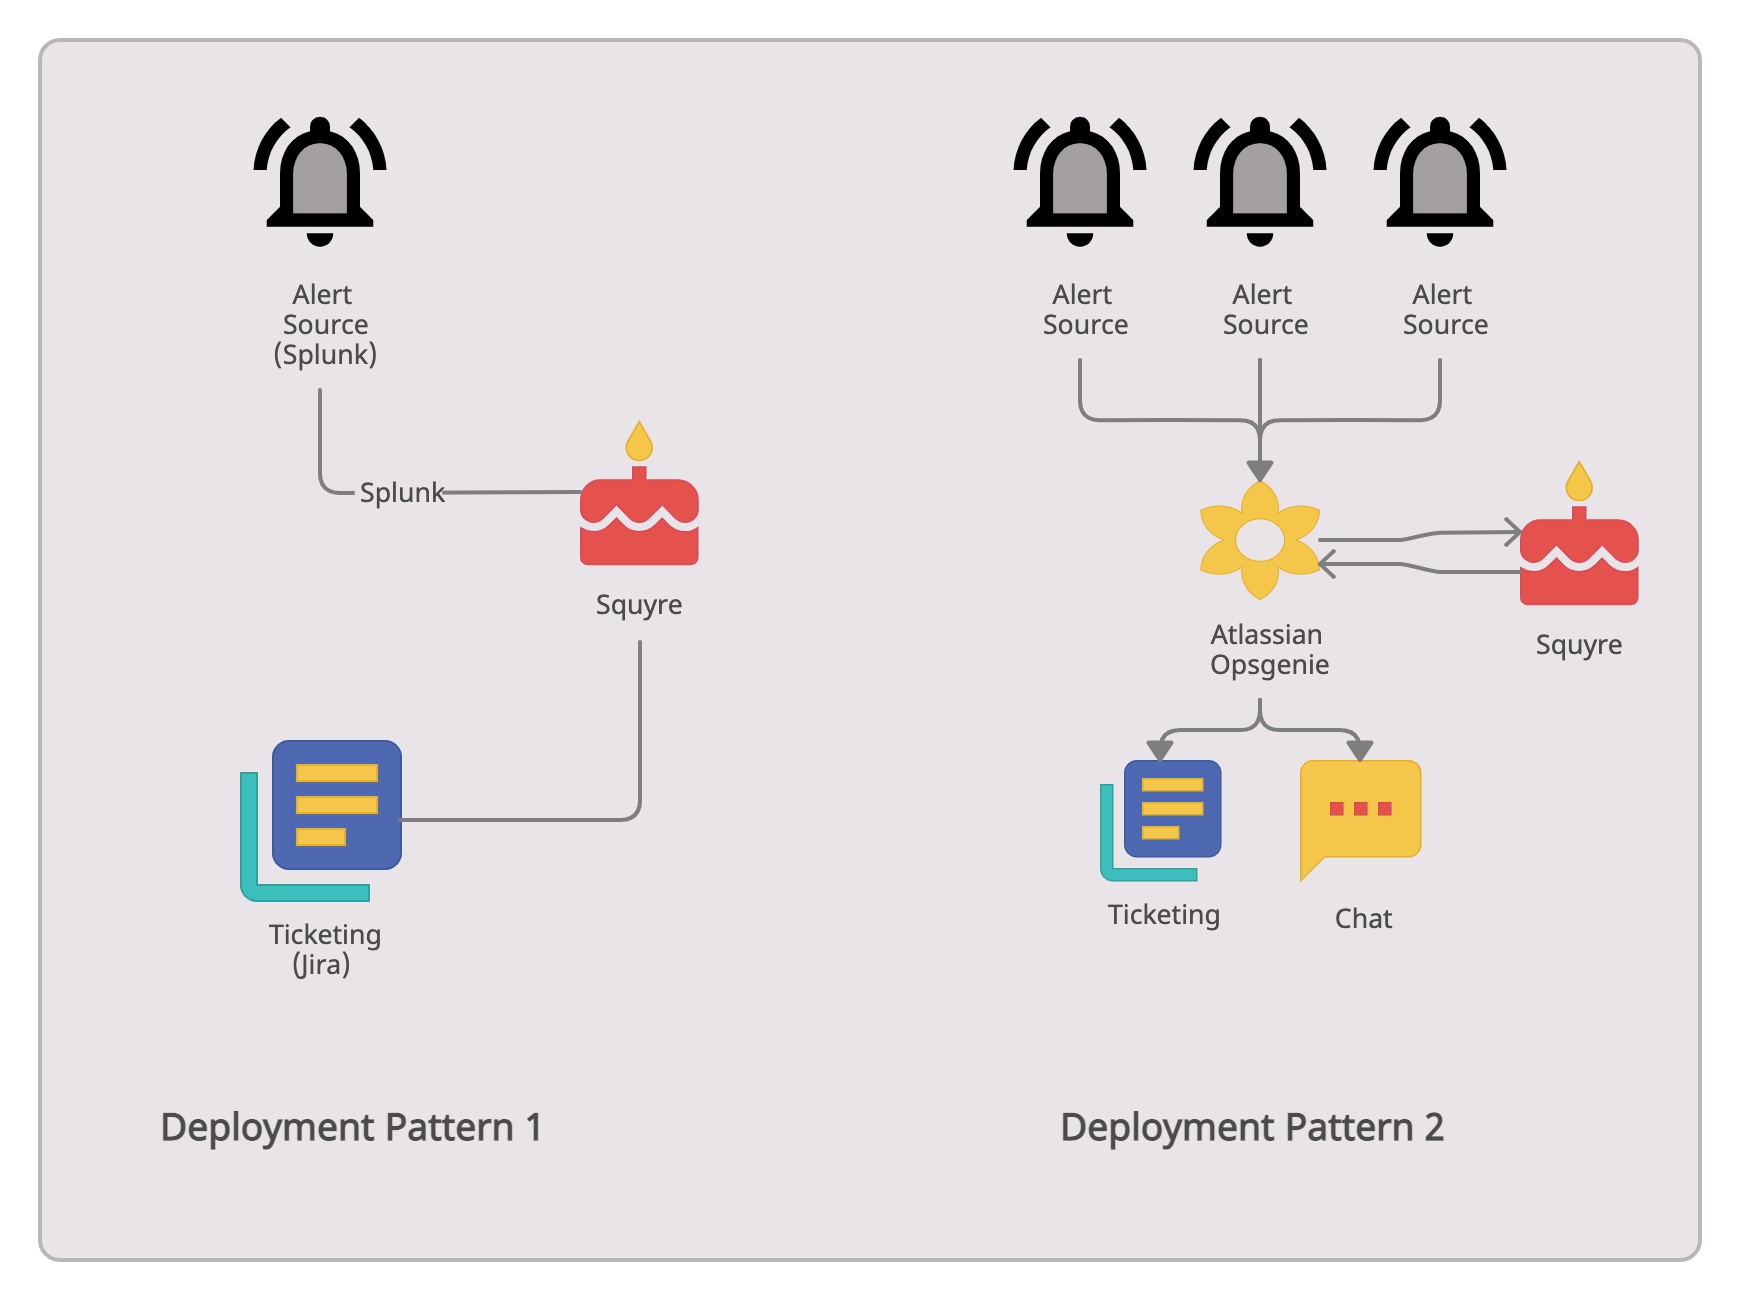
There are a couple of ways you can deploy, either directly between your alert source and ticketing system (pattern 1), or using an incident management platform like Opsgenie (pattern 2).
Pattern 1 is the out of the box configuration as it’s the most generic. If you don’t already have something in place to create tickets automatically when alerts fire, then this is for you. We currently support Splunk and Sumo Logic for alert sources. Jira is the only supported ticket management system right now.
Pattern 2 however, is more scalable. Using an incident management platform allows you to add as many alert sources as you like, without having to change anything on the Squyre side. We only support Ogsgenie today, with PagerDuty likely to come next.
Either way, you start the same way to deploy Squyre to AWS! It’s pretty easy.
- Clone the repo.
git clone https://github.com/gyrospectre/squyre.git
Run the setup wizard. You’ll be asked to specify your alert source and output platforms, and which enrichment functions to use. Hint: Choose only functions that don’t require API keys to get started quicker in your just want to play around!
make setup
- Note: If you choose Jira for your output platform, you’ll need to enter the Project name to create tickets in, and the base URL of your Jira Cloud instance.
In AWS, create an IAM user to use for deployment. Whilst you can definitely cut down things further, a user with the
IAMFullAccessandPowerUserAccessmanaged policies will work fine. You don’t need console access here, just chooseAccess key - Programmatic access.Pop the credentials of this new deployment user into your shell. See this guide if you need help.
Build and deploy the stack. Just use the defaults when prompted, to deploy a stack named
squyre.
make build
make deploy-guided
- Depending on what options you chose in step 3, see the child pages of the Functions and Getting Started sections of this documentation for specific setup requirements for each.
